Jan
06
2010
Yeah! It’s time for the very first Color Throwdown of 2010!! Can you believe another year has come and gone?? We’re also celebrating because we have a brand new CTD designer!! She’s so cool and so talented and I bet you already know her….Kristin Bueter!! And for her initiation, we’ve asked her to start the […]
Dec
29
2009
I wanted to play along with the technique challenge at Splitcoaststampers this week. I’ve never tried the Van Gogh technique before, but it sure was fun and I can’t wait to experiment some more! I chose Fairy Dust is a Must from Our Craft Lounge to work with and decided to try it on kraft […]
Dec
28
2009
So did you shop the day after Christmas? I only went to a local pharmacy to stock up on Christmas wrapping paper and a few other things for next year. It was close and I didn’t have to fight the crowds! Just the way I like to shop! I’ve got a card to show you […]
Dec
16
2009
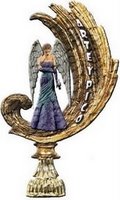
~ This is my last post as an Angels Landing design team member. I’m very sad to leave this great team of wonderfully talented ladies. Judi Maddigan is SO VERY gifted as an artist and such a great pleasure to work with. I’m grateful to her for allowing me to play with her adorable images […]
Dec
09
2009
~ This week’s design team challenge at the Angels Landing blog is to finish the edges of our cards. I’ve finished the edges of my scalloped circle card front with sponging and a line of pink stickles. I also finished the edges of the patterned paper on the inside of the easel card by using […]
Dec
09
2009
~ This week I’m hosting the Color Throwdown challenge, and our sponsor is My Favorite Things! Woo hoo! Everybody loves MFT!! Hey, did you know that I was a Guest Designer for them way back in October 2007? Yep, I was! That was before I even had a blog! If you play along with us […]
Dec
04
2009
Hi, everyone! I have another Our Craft Lounge Christmas card to show you today. Funny, because I had already started on this card using the Cosmo Cricket Jolly by Golly paper, when I received the Zva package that I showed in THIS post. So what a coincidence that I used a very similar mix of […]
Dec
02
2009
This week for the Color Throwdown, Danielle chose some yummy colors just perfect for another Christmas card! Here they are: ~ This presented such a wonderful opportunity to use this adorable Tilda with Wreath from Magnolia-licious. Well, that coupled with the fact that they’re sponsoring the challenge this week!! ~ ~ I just adore her […]
Nov
27
2009
I’ve missed the last couple of weeks of playing in the JUGS girls challenges so I made it a point to get a card done for this week’s JUGS8 color challenge. What a fun combination of bashful blue, pumpkin pie and really rust! I also used the C4C12 sketch for this week too! Here’s my […]
Nov
20
2009
I just love fairy tales! So I was thrilled when I found out I would get to use Fairy Dust is a Must for the Our Craft Lounge blog hop. These little darlings are so cute, aren’t they?! ~ ~ I went for a rustic, woodsy feel for my card today. But I can’t […]