Dec 22 2009
A Star Photo Ornament

I made 7 of these Star Photo Ornaments, one for each of our grandkids. They’re easy really. And I’ve got step by step instructions for you.
First, I have to mention that I was totally inspired by Anabelle O’Malley’s star ornament. I was quite taken with it and knew as soon as I saw it that I needed to use the design for photo ornmaments.
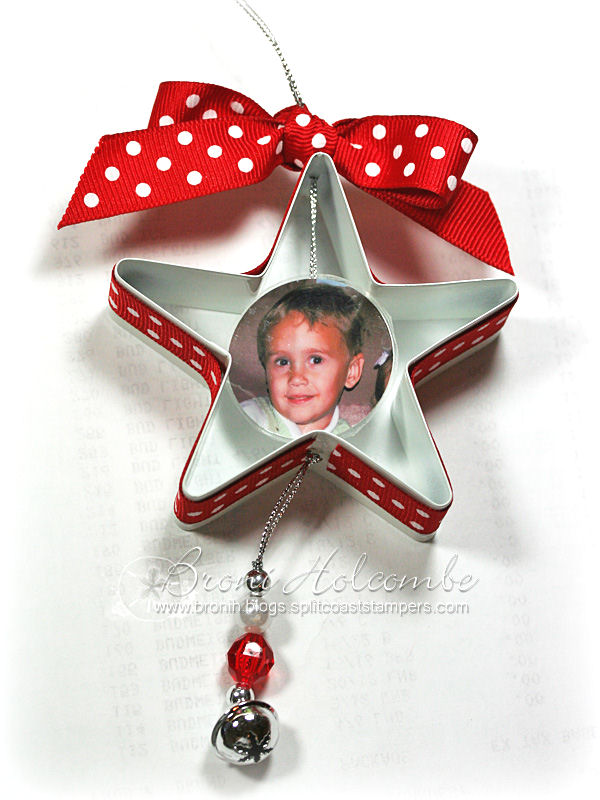
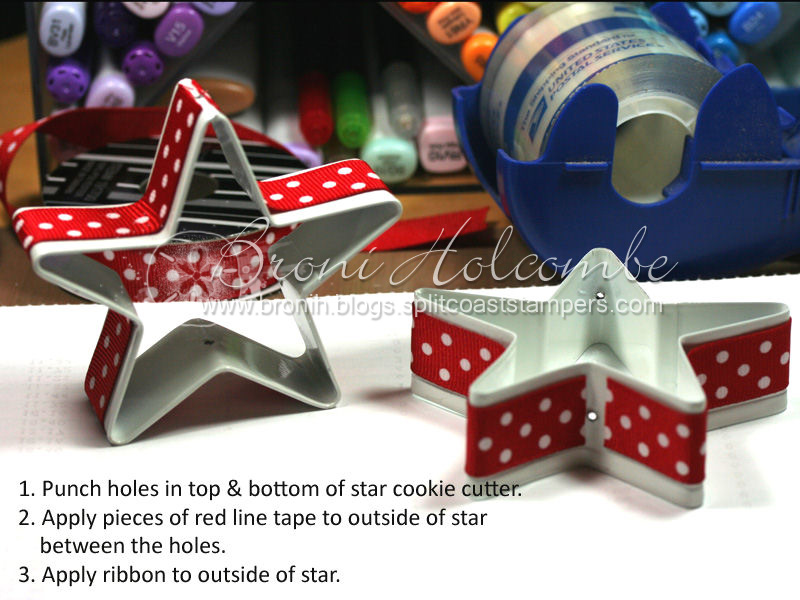
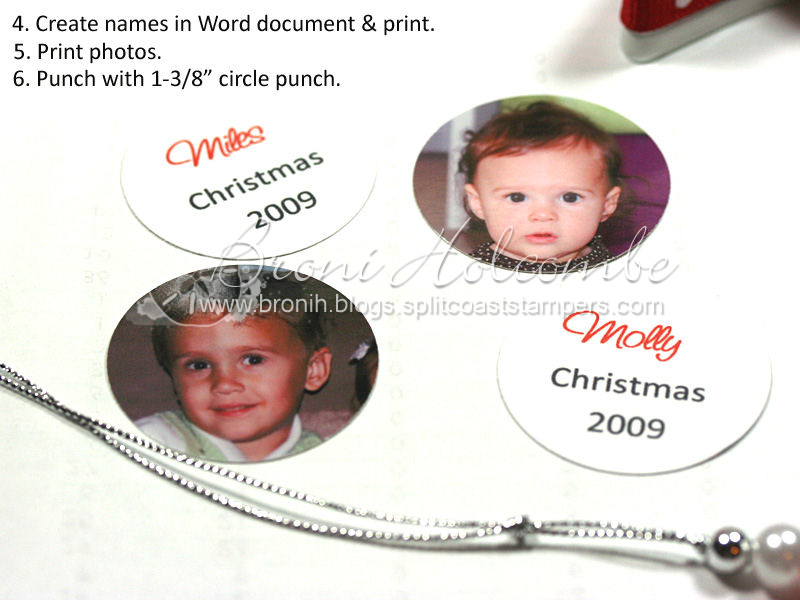
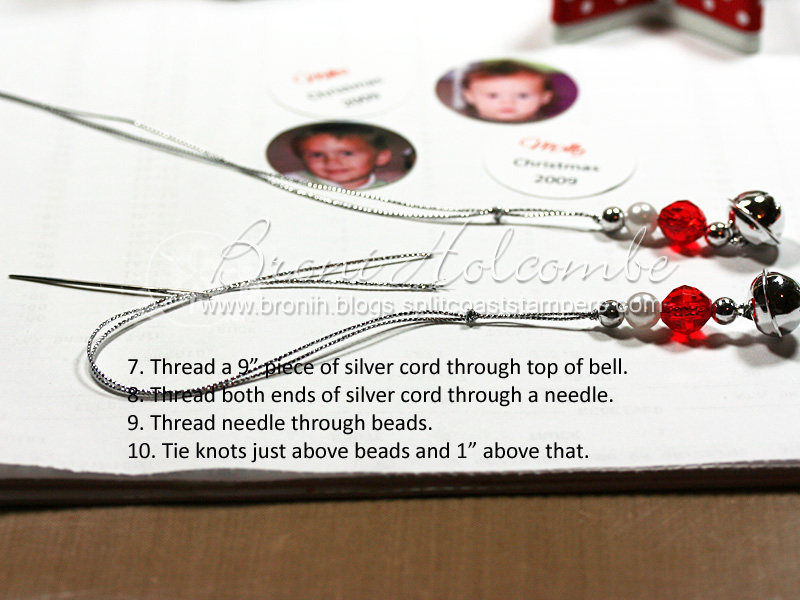
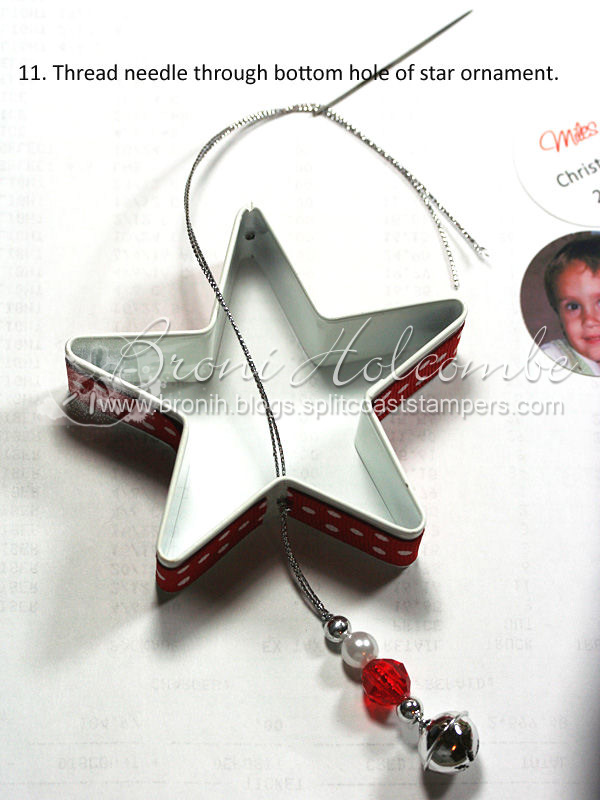
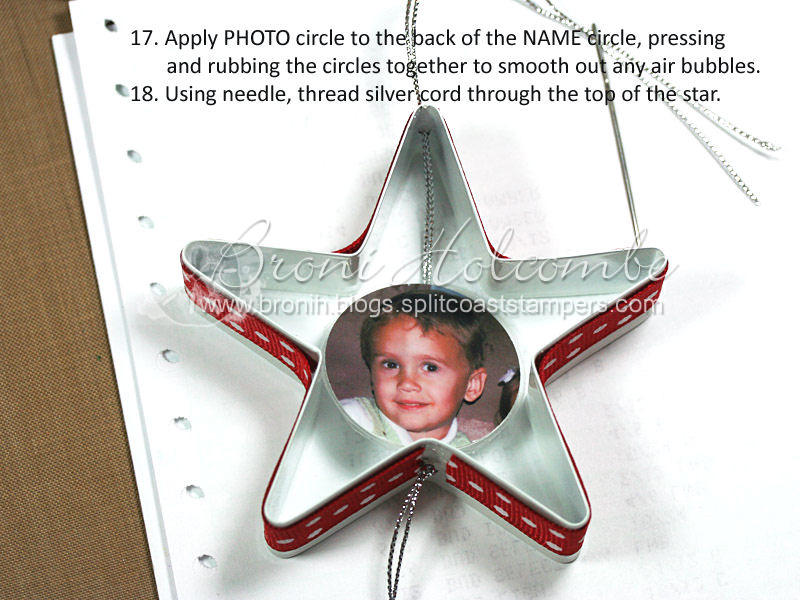
So here are the instructions, using white star-shaped cookie cutters that I picked up at Michael’s.

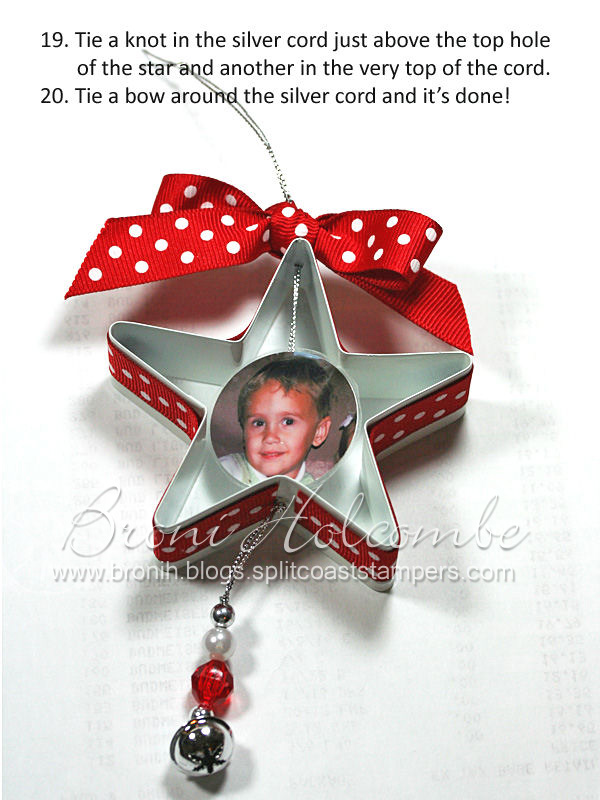
And that’s it! If you have any questions, please feel free to email me.
Thanks for visiting me today!


- Stamps: none
- Paper: white
- Ink: computer (fonts used are Saginaw and Calibri)
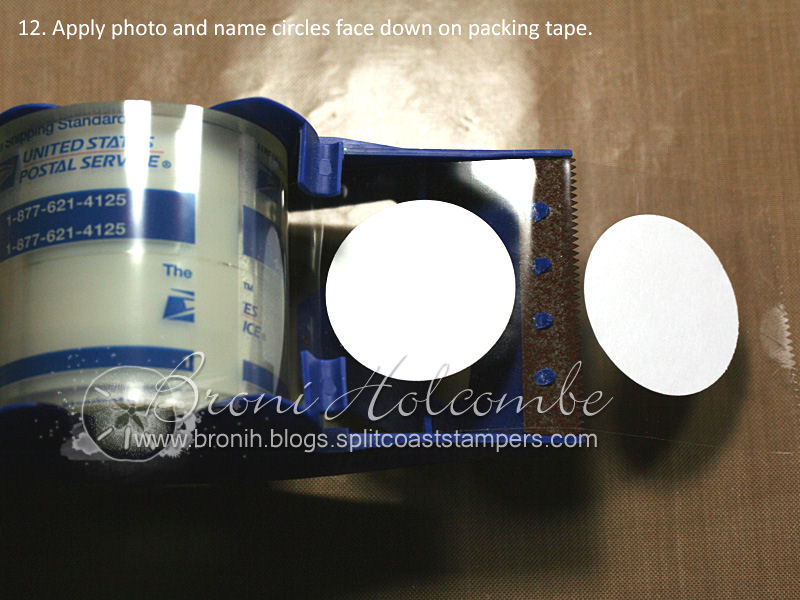
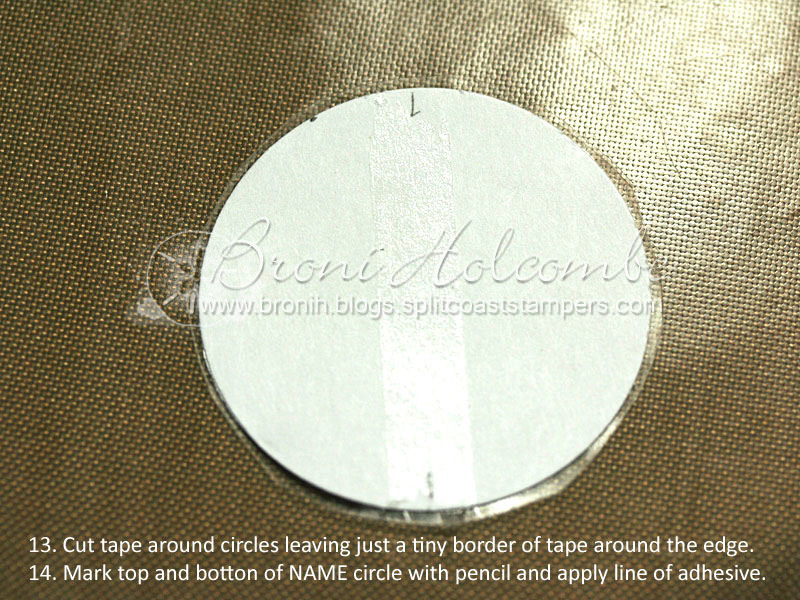
- Other: photos, star cookie cutters, metal hole punch, red line tape, ribbon, 1 3/8″ circle punch, bells and various beads, silver, cord, craft needle
11 responses so far


Fantastic Broni! Cute photo!
The red polka dot ribbon looks really festive!
Thanks for showing how you made these.
Oh, my goodness! This is precious, Broni. What a perfect grandma gift.
What a CUTE idea, Broni! I will have to remember these for next year!
Wow this is fabulous Broni, what a fun and clever idea!!
These are fantastic! What a fabulous idea and totally adorable!
Those are great. How creative. TFS.
Oh Broni – what a sweet keepsake. I LOVE photo ornaments, we have a lot on our tree.
Oh my goodness, these are adorable. I think what amazes me most is how people (like you, not me) take an ordinary item like a cookie cutter and “see” the potential in it! Okay, like Anabelle, since you saw them there first! But still….SO cute!
BEAUTIFUL! Love how you did the cord and beads.
Merry Christmas to ya! 🙂
Oh, Broni, I just ADORE these!! What a wonderful idea to add the photo to the middle. I’m going to try that next year. 😉 Love the red ribbon on it and the beads, too!
How cute. And I could probably even get 2 for my nieces done by tomorrow if only I had a crop-o-dile- to punch a hole in metal. Hopefully Santa will bring me one and I can do them next year.